Showing posts with label hand knit. Show all posts
Tuesday, August 20, 2019
Wednesday, November 02, 2016
San Sebastian--Yarn shop Established in the early 1900"s
What a charming shop. Our tour guide in San Sebastian took us to all the beautiful sites in this city on the Bay of Biscay. As we walk to one of the many parks, I asked if she knew of a yarn shop in town. Well of course Eskerne (eskerne@discoversansebastian.com) did know of a place, she knows all the places to go in San Sebastian. So we walked to this shop, just around the corner. Large space with classroom, sitting area and many yarns and notions. I loved it and I guess I was beaming because in addition to the lovely yarns, gadgets and patterns I purchased, the owner threw a few goodies into my bag. She was very proud of the shop and of the fact that the shop had been located in the same place and running successfully for the last 110 years!!!! Wow. Now all I need to do is return to this beautiful city and find that shop again. It is near Plaza de Guipuzcoa. 

![]() |
| A little bit a breakfast in San Sebastian |
Labels:
cotton yarn,
crafts,
creative.,
great classes. entrelac,
grosgrain ribbon.,
hand knit,
hats,
hoodie,
kids knits,
knit shop,
knitting in the round,
patterns,
san sebastian,
spain,
yarn
Monday, October 31, 2016
Minions
September 2015- I know a little man who loves Minion's. After checking on-line for patterns for an afghan and mittens, I created my own. (sorry I just crocheted and didn't write anything down) 
I found this little poster at the craft store to use as a model to follow... I'm not up on all the features of these lovable little guys
The Afghan--child size
Friday, October 21, 2016
Knitting down South- Biltmore and a train ride through the Smoky Mountains
The Biltmore Estates is a wondrous place. Visited at the end of May (2016) and found myself in a truly beautiful part of the United States. The amazing structure, gorgeous landscapes and beautiful gardens..![]() |
| Biltmore Green House |
![]() |
| Biltmore House Gardens |
![]() |
| Smokey Mountain Railway Ride |
We took a train ride through the Smokey Mountains, stopped to enjoy the river...and sat to knit a bit.
Sunday, July 31, 2016
Adding the finishing touch to bands--Ribbon
Grosgrain ribbon adds a finishing touch to sewing on a zipper in knitted items. It not only adds a nice look to the inside but it adds to the durability and security of the stitches in the garment.
That ribbon hides yarn ends and any hand stitches that may not be perfect.
What you need:
1. Grosgrain ribbon - measure twice the length of the band Plus 5 "
2. Matching thread to the ribbon... Perhaps your sweater is blue but you are using a white ribbon. You will need the ribbon color thread.
3. Needle, pins (long quilting pins are best) and scissors. Thimble if you use one is helpful, especially sewing through ribbon.
Step 1 Pinning-
A. Cut the ribbon in half.
B. Position the ribbon so that you have enough on either end (top and bottom) to fold over to the zipper top and bottom.
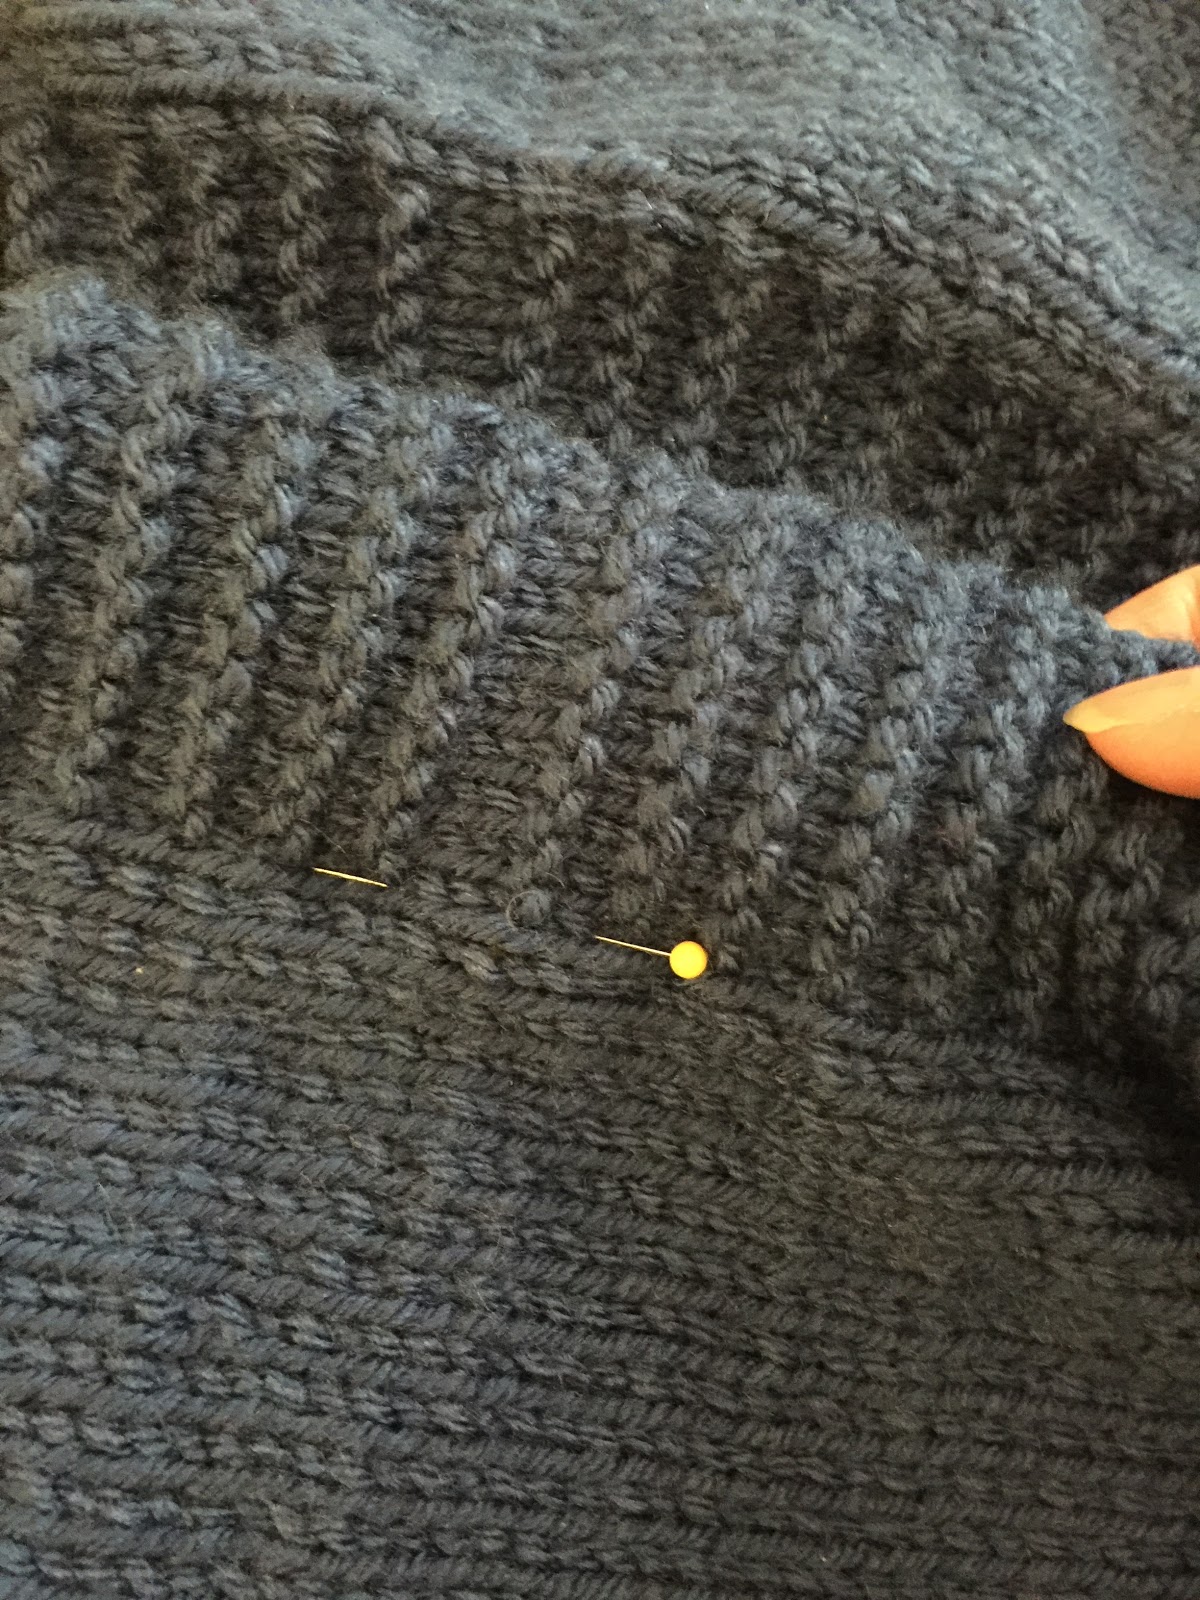
The ribbon should be positioned to cover the hand stitches on the zipper and can overlap the knitted surface.
Pin the remaining ribbon down, covering the hand stitches.
Step 2 Sewing-
Using a whip small stitch, stitch the the ribbon to the zipper band and the sweater. Your stitches should not be visible on the ribbon.
That ribbon hides yarn ends and any hand stitches that may not be perfect.
What you need:
1. Grosgrain ribbon - measure twice the length of the band Plus 5 "
2. Matching thread to the ribbon... Perhaps your sweater is blue but you are using a white ribbon. You will need the ribbon color thread.
3. Needle, pins (long quilting pins are best) and scissors. Thimble if you use one is helpful, especially sewing through ribbon.
Step 1 Pinning-
A. Cut the ribbon in half.
B. Position the ribbon so that you have enough on either end (top and bottom) to fold over to the zipper top and bottom.
The ribbon should be positioned to cover the hand stitches on the zipper and can overlap the knitted surface.
Pin the remaining ribbon down, covering the hand stitches.
Step 2 Sewing-
Using a whip small stitch, stitch the the ribbon to the zipper band and the sweater. Your stitches should not be visible on the ribbon.
Monday, March 14, 2016
Zippers in sweaters.
Installing zippers in Children's sweaters is not as hard as it may seem and the sweaters look fantastic.
What you need:
1. Separating zipper, I like the bright heavy plastic ones. Measure the front band of your cardigan and make sure the zipper you purchase to not longer then your measurement. (13" band buy a 12" zipper).
2. Thread - best to have a color matching your sweater yarn.
3. Straight pins- the longer quilt pins are very good for this job.
4. Grosgrain ribbon, for the finishing on the inside of the zipper. Double the length of your zipper plus 5 " for length of ribbon needed. This can be a decorative ribbon, but make sure that it is not wider the 1". I'll show you how to add this in a future post.
Step 1
A. With a closed zipper, pin the zipper to the band. The edge of the band should be a scant distance from the teeth of the zipper. You do not want the zipper to catch.
Test it by running the zipper up and down, it should do so easily.
B. You can now hand baste (a long running stitch) the zipper and band together so that the pins can be removed.


Step 3
A. open the zipper.
B. fold the top and bottom of the zipper to the inside.
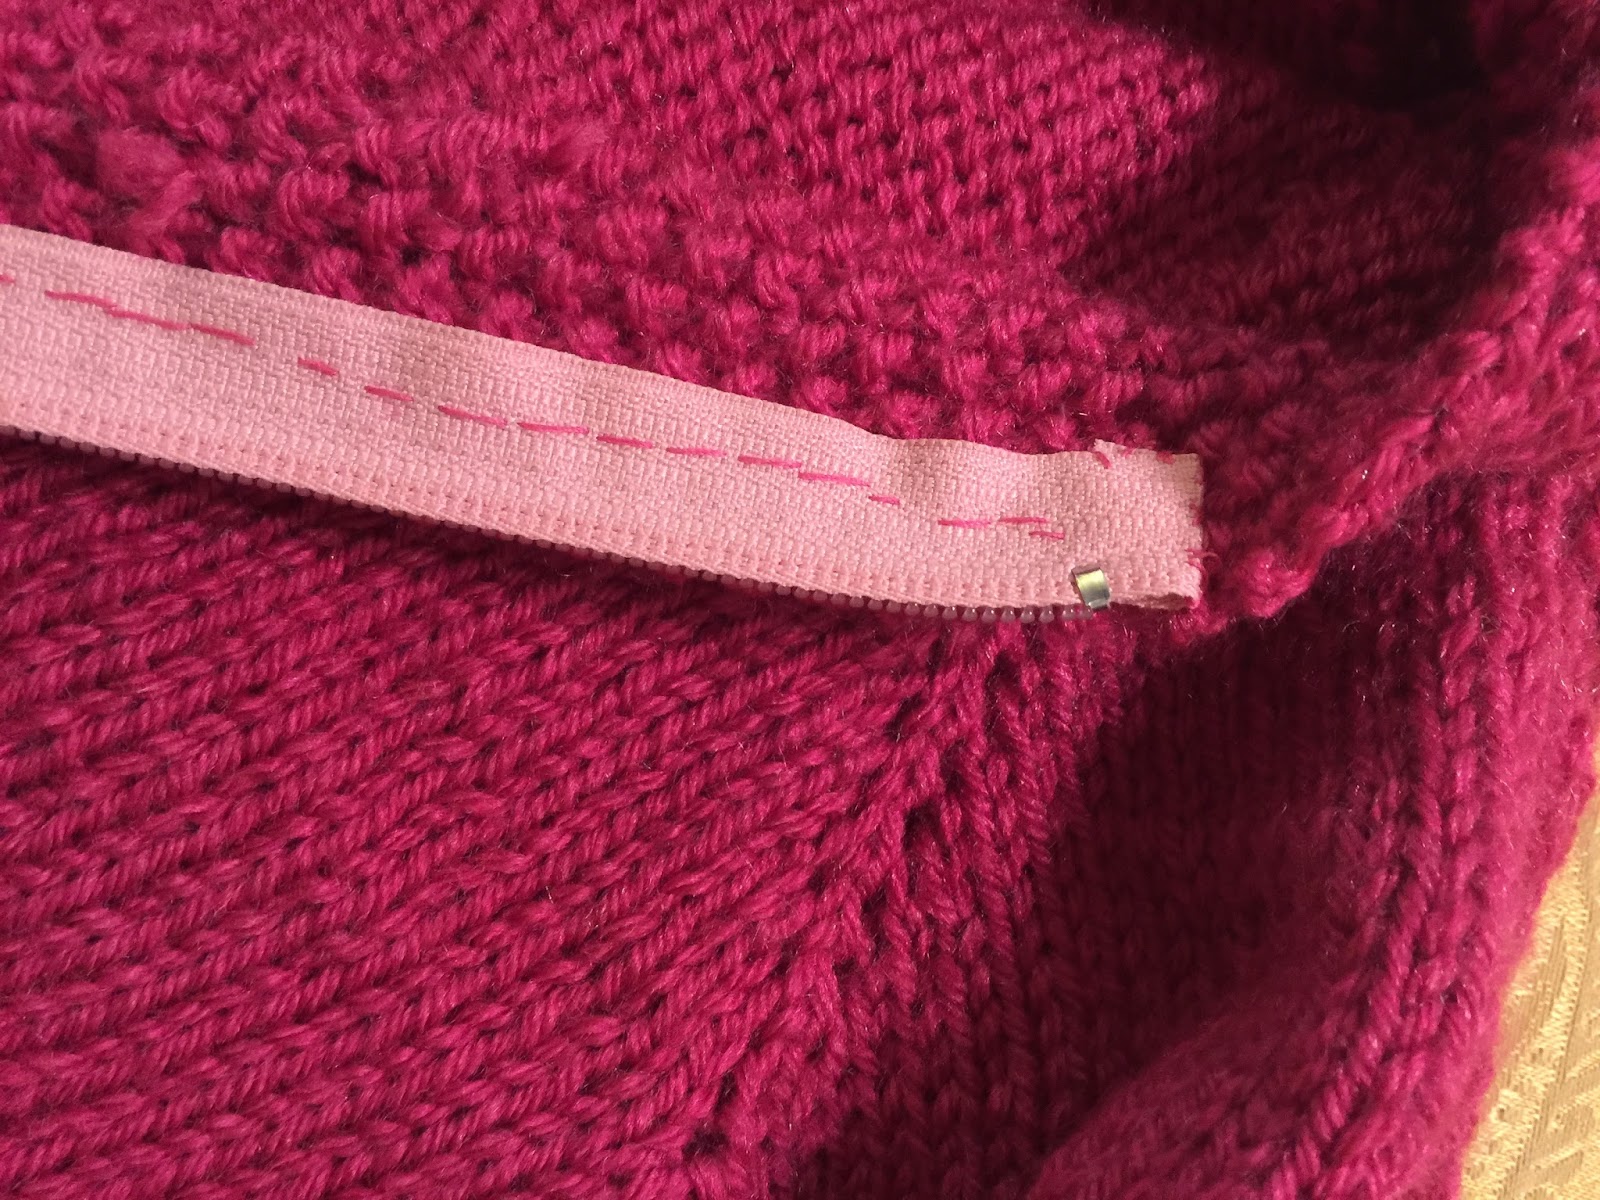
C. hand stitch the zipper to each band. The hand stitches are made in the middle of the zipper band not close to the teeth.
The back stitch is a great secure stitch to use.
Backstitch guide link
D. notice the slip stitches around the folded end of zipper (above) and that when the seam is sewn, the edges of the band are not sewn close to the teeth of the zipper. I pinned the edge over on this completely sewn band. The zipper head must have room to move up and down.
FINISHING- Adding the grosgrain ribbon and finishing the sweater........ To Be Continued
What you need:
1. Separating zipper, I like the bright heavy plastic ones. Measure the front band of your cardigan and make sure the zipper you purchase to not longer then your measurement. (13" band buy a 12" zipper).
2. Thread - best to have a color matching your sweater yarn.
3. Straight pins- the longer quilt pins are very good for this job.
4. Grosgrain ribbon, for the finishing on the inside of the zipper. Double the length of your zipper plus 5 " for length of ribbon needed. This can be a decorative ribbon, but make sure that it is not wider the 1". I'll show you how to add this in a future post.
Step 1
A. With a closed zipper, pin the zipper to the band. The edge of the band should be a scant distance from the teeth of the zipper. You do not want the zipper to catch.
Test it by running the zipper up and down, it should do so easily.
B. You can now hand baste (a long running stitch) the zipper and band together so that the pins can be removed.
Step 2
A. Match the left and right band up so that the zipper will be centered up and down.
![]() |
| notice the zipper teeth are showing and that's OK You want the space for the zipper to pass through easily |
.
In my blue sample I have decided to overlap the bands, so I will be pinning the second zipper inside further into where the band and sweater meet.

Step 3
A. open the zipper.
B. fold the top and bottom of the zipper to the inside.
C. hand stitch the zipper to each band. The hand stitches are made in the middle of the zipper band not close to the teeth.
The back stitch is a great secure stitch to use.
Backstitch guide link
D. notice the slip stitches around the folded end of zipper (above) and that when the seam is sewn, the edges of the band are not sewn close to the teeth of the zipper. I pinned the edge over on this completely sewn band. The zipper head must have room to move up and down.
![]() |
| Center seamed zipper |
![]() |
| Finished sweater. That's a cross stitch ballet slipper... directions to follow. in a future post.. |
FINISHING- Adding the grosgrain ribbon and finishing the sweater........ To Be Continued
Subscribe to:
Posts (Atom)